Search

Showing posts with label Sal's Flamenco. Show all posts

Sal's Flamenco - sanding

  The tuner slots are rammed.


The entire guitar goes through a thorough process of sanding.

The entire guitar is cleaned with naptha from all sanding dust, let dry, awaiting to be finished.

Sal's Flamenco - gluing the bridge

I made a vacuum pump from a compressor a couple of years ago, when I was swamped with repair work, especially bride reglues. It worked great for that period, re-gluing many bridges, including a Paul Fischer, Paulino Bernabe, among very many others. Just 2 weeks ago, it failed! So it's back-up plan, to the bridge clamps I go.
Left her clamped up overnight and chiselled clean the glue squeeze out.

Sal's Flamenco - the bridge II

Once you have used the 12-hole design, you won't look back. This bridge is designed for a forty five degree break angle.
To achieve a half inch tie block, I need to shave a bit off the edge from the back.

After further profiling on the front and the wings, the bridge is sanded smooth and clean with naptha.
Despite the length, the completed bridge stayed sub-20.

Sal's Flamenco - the bridge

For this guitar, I specially chose the lightest rosewood blank from my stock, as the Flamenco bridge will be significantly longer than usual (18mm longer than the '33 Santos Hernandez!), to achieve the greatest efficiency of the whole box, from the bridge point of view.
Firstly, the nut slot is routed.
The front of the tie block is established with another slot.
Two more vertical routs will determine the wings.
The wings are shaped by chisels, instead, to avoid more saw dust, which power tools, do create lots more. I felt my process with the chisels, scraper, and sandpaper is just as fast, if not more satisfying.
The wings on the bass side is more or less done.
Both wings are completed. But, the Sal Flamenco's bridge is only halfway there.

Sal's Flamenco - neck carving

Establishing the depth of my neck at the 1st and 9th frets with a half round rasp.
With a spokeshave the neck is levelled at those two points. It's great pleasure working with Spanish Cedars. They are not only very workable, but always fills the whole studio with her sweet aroma.


The contour of the neck, the heel and the headstock areas are refined to join seamlessly to each other with various chisels and rasps.

Sal's Flamenco - fretting


After final sanding of fretboard, fret slots are deepened to accept the frets


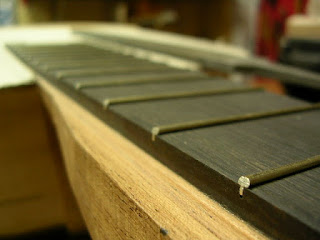
All frets installed.


Fret ends are cut with end nipper.


An 8" file (in background) ground the ends perfectly flushed to the fretboard, then slightly bevelled inwards.


All frets are markered black prior to levelling.


The 14" file levelled the frets flat.


The flattened frets are crowned and ends are filed super smooth to touch.

This concludes the fretting of Sal's flamenco guitar.

Stay tuned by subscribing to this blog or put in your email at top of page.

Sal's Flamenco - gluing the fingerboard


I used to round the soundhole by hand with a file. Now, I make a round disc to fit my soundhole, fit it with sandpaper, hook it up on the drill and let it trim out a perfect circle.


The fingerboard is being glued on.

Sal's Flamenco - fingerboard - cutting out soundhole end


The ebony fingerboard is indexed to the Spanish Cedar neck into pre-drilled holes with two brads, on the first and eleven frets' positions. This allows accurate marking and shaping of the fingerboard on the soundhole end.


With the line as guide, the fingerboard is roughly cut out with a coping saw.

Sal's Flamenco - fret slotting


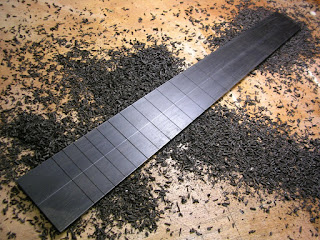
I'm cutting the 6th fret... all are cut to the depth of 3/32" with a simple guide block clamped on the left of saw. It gets a little harder to saw through on the last 1/32", so the parrafin (white) helps lubricate the saw a bit.


After all the 19 frets are cut, the fingerboard is tapered from nut width of 50cm to 12th fret width of 61cm. With the lines drafted, the fingerboard will be carefully planed to them.


Here's work done so far...

Sal's Flamenco - ebony fingerboard


This african ebony fingerboard is being scraped to achieve the glue face, to the neck.


African ebony micro scraper shavings.


The scraped surface needs no sanding.

Sal's Flamenco - final scraping of the bindings


The bindings are leveled out at every place.
(Single purflings of maple/walnut, for the back, like the sides)


Here's the new heel design with the consistent binding/single purfling scheme.


Here's the double purfling scheme for the top.

Sal's Flamenco - scraping the bindings flush to the sides


With a sharp scraper, leveling the bindings flush to the sides is quite therapeutic :)

Sal's Flamenco - installing third & fourth binding strip

third and fourth rosewood binding strip
Right after installing the third binding strip, I had a surprise visit from a diligent former student, who is Berklee-bound next month!

After coffee, came back to bind the fourth and final binding of the paulownia back.

Sal's Flamenco - installing first binding strip


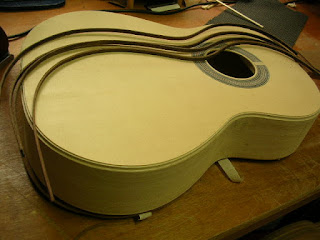
The four rosewood bindings for this flamenco guitar, had to be pre-bent to shape before installing unto the ledges. At 2.5mm, the rosewood bindings are too stiff to flex itself round the guitar's profile. It's an extra step to bend them accurately for the perfect installation. But it looks good and protects the guitar against minor daily knocks.


These are a few sheets of the veneers I have in stock. The top (chocolate) sheet is walnut and the lower two are lightly figured maple. They are 0.5mm thick, among the thinner varieties of veneers around. They are fragile, crumple easily and are prone to tearing, just by looking at it! Oh yes, the purflings in this guitar are made from strips of them. The back has single purfing, that is-walnut/maple, while the top has double purflings.


The first binding strip has been glued down, held on by masking tapes.


The mess after unmasking...


A little cleanup with a scraper at the tailend, to prepare for the other binding pair.

Sal's Flamenco - endgraft mitred & final touch up the staircase binding/purfling ledges


The little nubs on the four corners of the rosewood endgraft, left behind after the staircase routing, was chiseled away. The purflings, seen here are mitred at 45 degrees, on all four corners, waiting to receive their mating purflings.


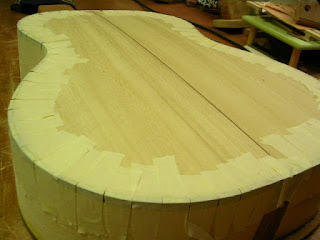
The heel design has a continuous heel cap from the paulownia back plate. So, to receive the bindings and purflings, it is treated differently than usual...


The staircase ledges are carefully continued all round, by hand (chisel, mini-file, razor blade that is).


On the spruce soundboard end, the staircase binding/purfling ledges are also continued by hand, which the router cannot reach.