The traditional timbers for guitar necks are probably Honduras Mahogany & Spanish Cedar. For this guitar I'm using Paulownia.

The selected Paulownia neck blank for this guitar.

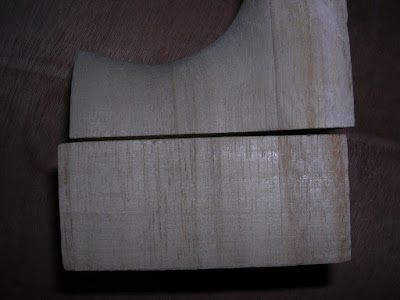
The neck blank, sawn at an angle with a backsaw.

The angled faces is smoothed out with a #4 plane to provide a good mating surface for gluing. But the knife edges of the sawn part chips off too easily when planed.
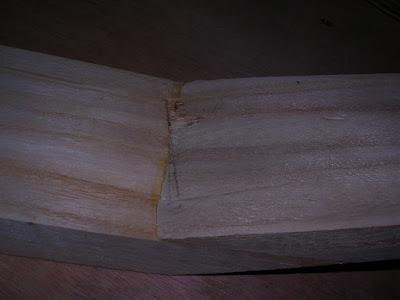
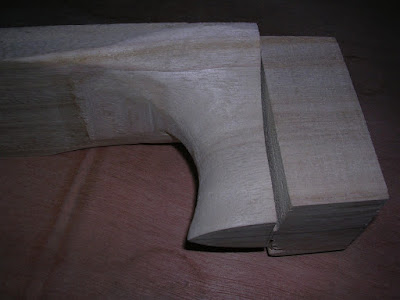
See the result when they are glued, by turning one over another and glued (scarf joint) to form the head and neck. It does looked crude at this point!

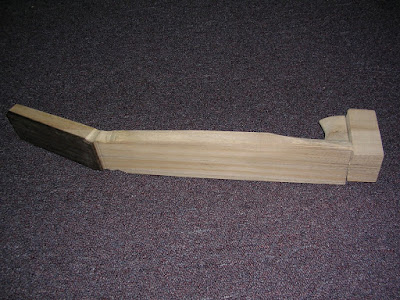
The heelblock of Paulownia is then glued on the other end. I use Aliphatic Resin glue.

This is the result thus far.

The neck assembly is then vise clamped and slots for the sides are sawn with a smaller backsaw on either side.

Next, with the neck assembly vertically clamped, the headblock is trimmed to width.

See the chipped edge? Paulownia is again, really quite brittle on the edges.

Some of life's most pleasurable messing around.

Here's the economy #4 plane I am using. Bought from a local retired woodworker. Works for me.

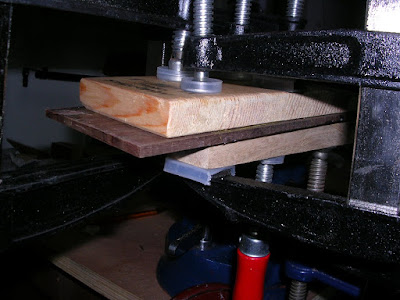
You are looking at the headstock sanwich of Indonesian rosewood headplate (top) with maple and walnut veneers (bottom).
Oops...can you see the clamping caul is longer? I over-planed the blanks during the scarf join surface preparation! Urrgh...wait...there's more...

I have also over-enjoyed my planing of the neck that the headstock is now tapered too narrow for the original headtsock design!
Licking those unexpected wounds, I find solace with more sawing on the heel...
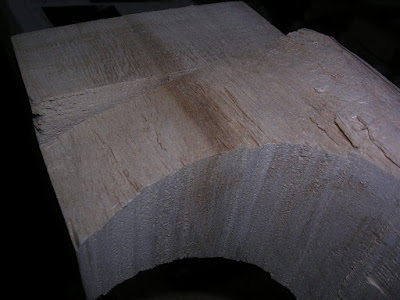
...some chisel carving work on the heel...
...more carving and light sanding...
...
...

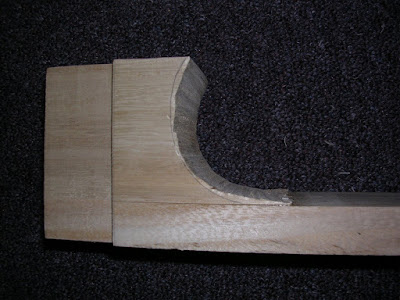
...say hi to my new head design!

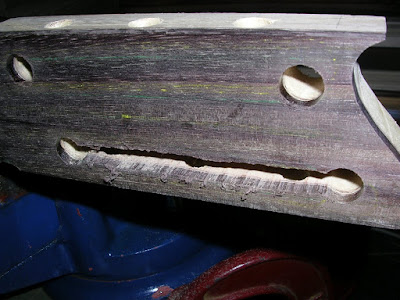
Felt like I went for broke with this weird headstock. Anyway, must believe by faith, that all things work for good! More work done...tuner holes drilled.

Drilled end holes for the slots.
Sawing the slots with coping saw...

...more sawing...

Neck work and bench cleaning done for the day.

This completes the neck work.

The selected Paulownia neck blank for this guitar.

The neck blank, sawn at an angle with a backsaw.

The angled faces is smoothed out with a #4 plane to provide a good mating surface for gluing. But the knife edges of the sawn part chips off too easily when planed.

See the result when they are glued, by turning one over another and glued (scarf joint) to form the head and neck. It does looked crude at this point!

The heelblock of Paulownia is then glued on the other end. I use Aliphatic Resin glue.

This is the result thus far.

The neck assembly is then vise clamped and slots for the sides are sawn with a smaller backsaw on either side.

Next, with the neck assembly vertically clamped, the headblock is trimmed to width.

See the chipped edge? Paulownia is again, really quite brittle on the edges.

Some of life's most pleasurable messing around.

Here's the economy #4 plane I am using. Bought from a local retired woodworker. Works for me.

You are looking at the headstock sanwich of Indonesian rosewood headplate (top) with maple and walnut veneers (bottom).

Oops...can you see the clamping caul is longer? I over-planed the blanks during the scarf join surface preparation! Urrgh...wait...there's more...

I have also over-enjoyed my planing of the neck that the headstock is now tapered too narrow for the original headtsock design!

Licking those unexpected wounds, I find solace with more sawing on the heel...

...some chisel carving work on the heel...

...more carving and light sanding...

...

...

...say hi to my new head design!

Felt like I went for broke with this weird headstock. Anyway, must believe by faith, that all things work for good! More work done...tuner holes drilled.

Drilled end holes for the slots.

Sawing the slots with coping saw...

...more sawing...

Neck work and bench cleaning done for the day.

This completes the neck work.